
There’s something mesmerizing about cities at night. When the sun is replaced with a stream of fluorescent lights and neon signs, it’s completely different to anything you’ll see during the day. Capturing this on camera may seem hard, but shooting nightscapes can be very simple, and something that every budding photographer should try. Most smartphone cameras now have a long exposure mode, so you don’t even need a professional-level camera to get those Instagrammable photos after sunset.
Equipment
Most tutorials will tell you to buy both an expensive tripod and high-quality ND filters, but neither of these items are necessary. A tripod – which can be bought second hand for as little as £10 – is advisable for keeping the camera still, but you could always stabilize the camera by resting it on any flat surface, like the handrail of a bridge, or even a stack of books. The camera must be completely still, so holding it is not an option for even the steadiest of hands. You may also want to use a two-second timer or a remote shutter release, as pressing the shutter button is enough to slightly bend your tripod and ruin your shot.
Location
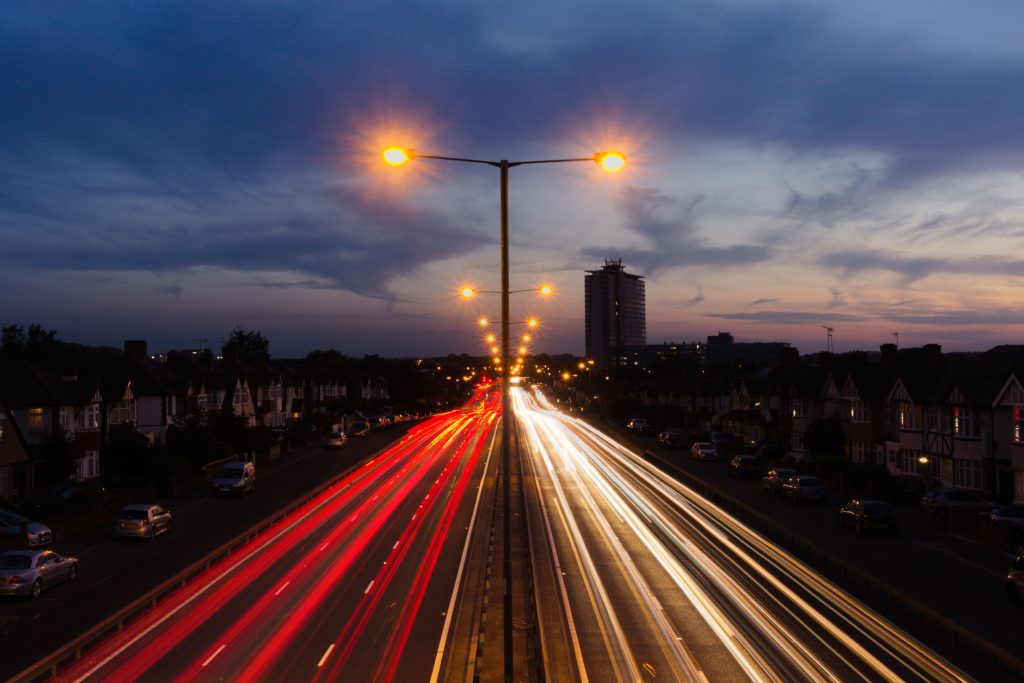
Shooting cityscapes refers to any urban environment at night, but the best place to start is with roads and light trails from cars, since other light sources with aesthetic appeal can be hard to find outside of big cities. In Egham, locations such as the green bridge in front of campus and the roundabout at the base of Egham Hill, by the BP petrol station, are great places to start.
Once you get to your location, experiment by taking a few test shots from different angles to get a sense of exactly how you want to shoot your photos, and whether you want to choose a different location instead.
Settings
Now that your camera is set up in the perfect spot, lower your aperture to f11-16 (if you’re using a camera) and raise your shutter speed to 4-30 seconds. Most smartphones have a camera setting called pro mode, which allows you to adjust the shutter speed, but Google how to access manual camera settings for your specific phone if you’re unsure. Take multiple shots, as the photo will change depending on how many cars drive though the frame. Once you have a photo you like, all that’s left to do is edit – brighten the lights by increasing the contrast or make the colours pop by increasing the saturation – and upload to Instagram.
Other Ideas
You don’t need to photograph moving objects to take advantage of long exposures. As well as blurring movement and capturing dimly lit scenes, using a longer shutter speed makes colours look extremely vibrant, and lit-up buildings or neon signs can also make great photos.
It’s also worth remembering that lights aren’t the only things that can be blurred: 30+ second exposures can turn large bodies of water into mirrors and 2+ minute exposures can make clouds soft and streaky. If you play around with exposures and give night photography a go, it shouldn’t be long before your Instagram is looking a bit more lively.