
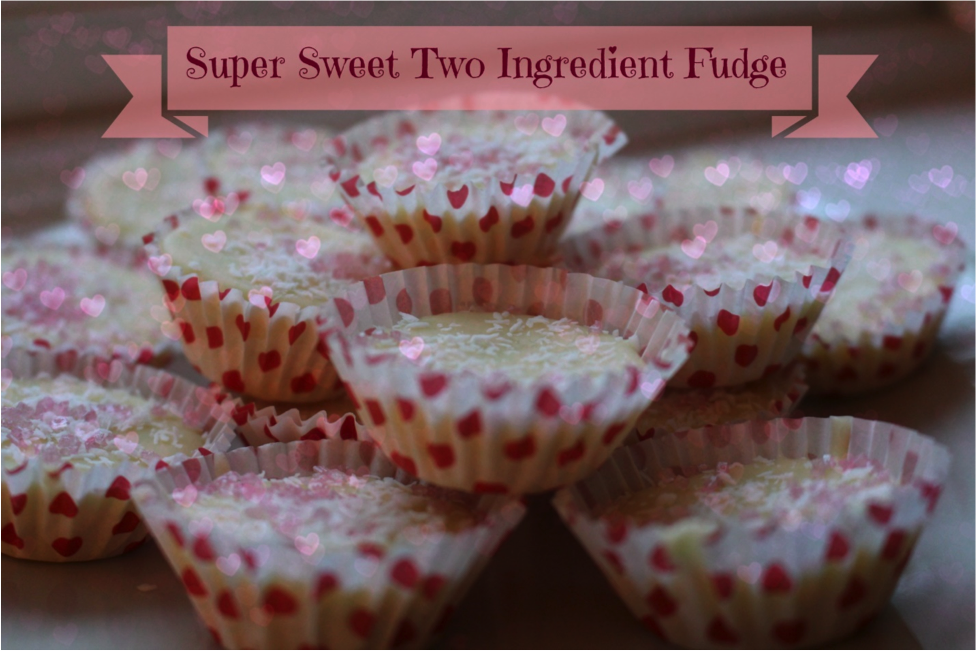
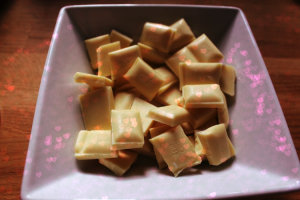
Valentine’s day is the perfect post-Christmas excuse to eat your own body weight in sugar! Whether that’s in the form of chocolate hearts from your other half, or ploughing through a 10-person portion of Victoria sponge cake, we all break our ‘new year, new me’ nutribullet fuelled fad when it comes to the 14th of February. We’ve tried and tested this 2 ingredient fudge recipe, that’s both simple (seriously student proof) and tasty enough to impress anyone this valentine’s day. The recipe makes around 40 fudge cups and It can also be frozen for up to 2 weeks after for that midweek pick me up.
Here’s how to do it:
What you’ll need:
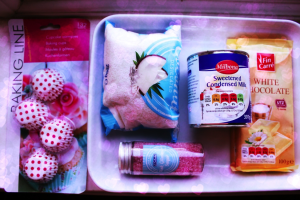
- A large microwavable bowl
- A fork, A tablespoon and a Teaspoon (if you even have this much clean cutlery around)
- Mini cupcake cases (I found these cute polka dot ones in TK max, 100 for £2.50)
- 2 Bars of chocolate (I used white chocolate but any kind works)
- 1 Can of condensed milk
Optional:
- Desiccated coconut
- Some form of sprinkle (mines pink and sparkly, what a way to give in to the commercialism of valentine’s day)
The Method:
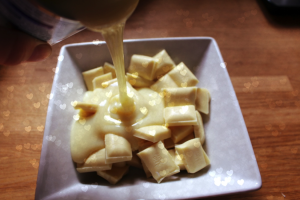
- Break up your chocolate bars into cubes and place in a microwavable bowl.
- Next, pour in the can of condensed milk and briefly mix through so most of the chocolate cubes are covered
- Then, place the bowl in the microwave for 2 minutes, taking the mixture out every 30 seconds to stir through with a fork. I would recommend using a fork as it’s important that the chocolate breaks up properly in order to fully melt
- Whilst the mixture is melting, place your mini cases onto a tray and spread out evenly. As I mentioned before, the mixture makes about 40 fudge cups, but for the sake of this recipe (and mostly because I couldn’t find enough space in my fridge) I have made 12.
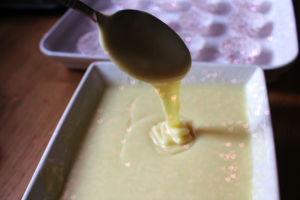
- Once the mixture is melted, you will need to stir it all together, folding the mixture with a spoon. This is the important step, as the air which becomes trapped in the mixture is what is going to help it to set, but you need to work quickly so that the mixture is runny enough to pour into the cases. The mixture should be smooth and should form a slight film on top when wobbled. At this stage it is perfectly okay to try the mixture, you know, just to make sure.
- You will need to pour your mixture into the cases, using the teaspoon to scrape the mixture into each case. You can then decorate your fudge with whatever toppings you want! I used desiccated coconut and sprinkles, but anything from coco powder, to dried cranberries could work.
- Finally, you need to pop the tray of fudge cups into the fridge to cool for 2-4 hours (or until stiff)

Extra step: If you find you have some of the mixture leftover, you can use the rest to coat some strawberries, or other fruit, and place them onto a tray to cool. If you choose to freeze the leftover mixture, defrost in room temperature for around 2 hours and you’re good to go!